Can be kept for 1 year!? Surprize wedding cake.


Tada—-n :D!
IMG_2671
Apporogize first that Today’s post might not be a lazy recipe,
How do you react if you were asked to make a wedding cake?

It actually happened to me a year ago…

When I first got the request from my childhood friend,
I was thinking how can I manage time for making such a big cake without professional tools and in the limited amont of time.

Since I was kinda busy & lazy person who love sleeping, I wished to have a proper sleep the day before I attend the ceremony
coz I was also asked to do some performance during the party.

While I was desparetely reading one recipe book,
I suddeny reached to one idea. – a sugarcraft cake:D !

It said sugarcraft cakes are originally come from British, which use sugar paste to cover the dry fruit cake with some alcohol so that can be kept for a year…

That’s the one!!! Google had been my great teacher since sugar craft cake is not common in Japan.

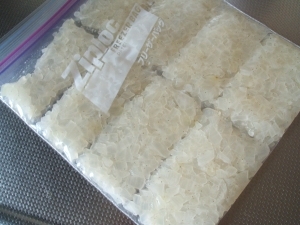
First thing to do when making a  sugarcraft is make a sugarpaste.

r01-2-250 IMG_2494 - コピー


DSC00028_small 68749-loop4

It was terrible when I first tried to make the top part as a trial 😦
Phewww =333
IMG_2496 - コピー

I learned that I need to complately dry all parts before I stick it together X( !!!

imagesCA30XVIO
Making sugar paste is like a bakery or clay fun.
It made me to get muscle pain in the end!

Inside of the sugar arts, I had to bake a fruit cake separately.
Only dried fruits and nuts were put and covered with the brandy and sugar.

12211609_4ef18613171e9  クルミ~1 ドレンチェリー

It took me for 4 hours to finish all chopping, mixing & baking.
but I could do it a week before the ceremony. Thank god I still had time to prepare for the decoration…!!

before start the decoration,
fruit cake needs to be covered by  marzipan.

IMG_2594 - コピー IMG_2597 - コピー IMG_2598 - コピー

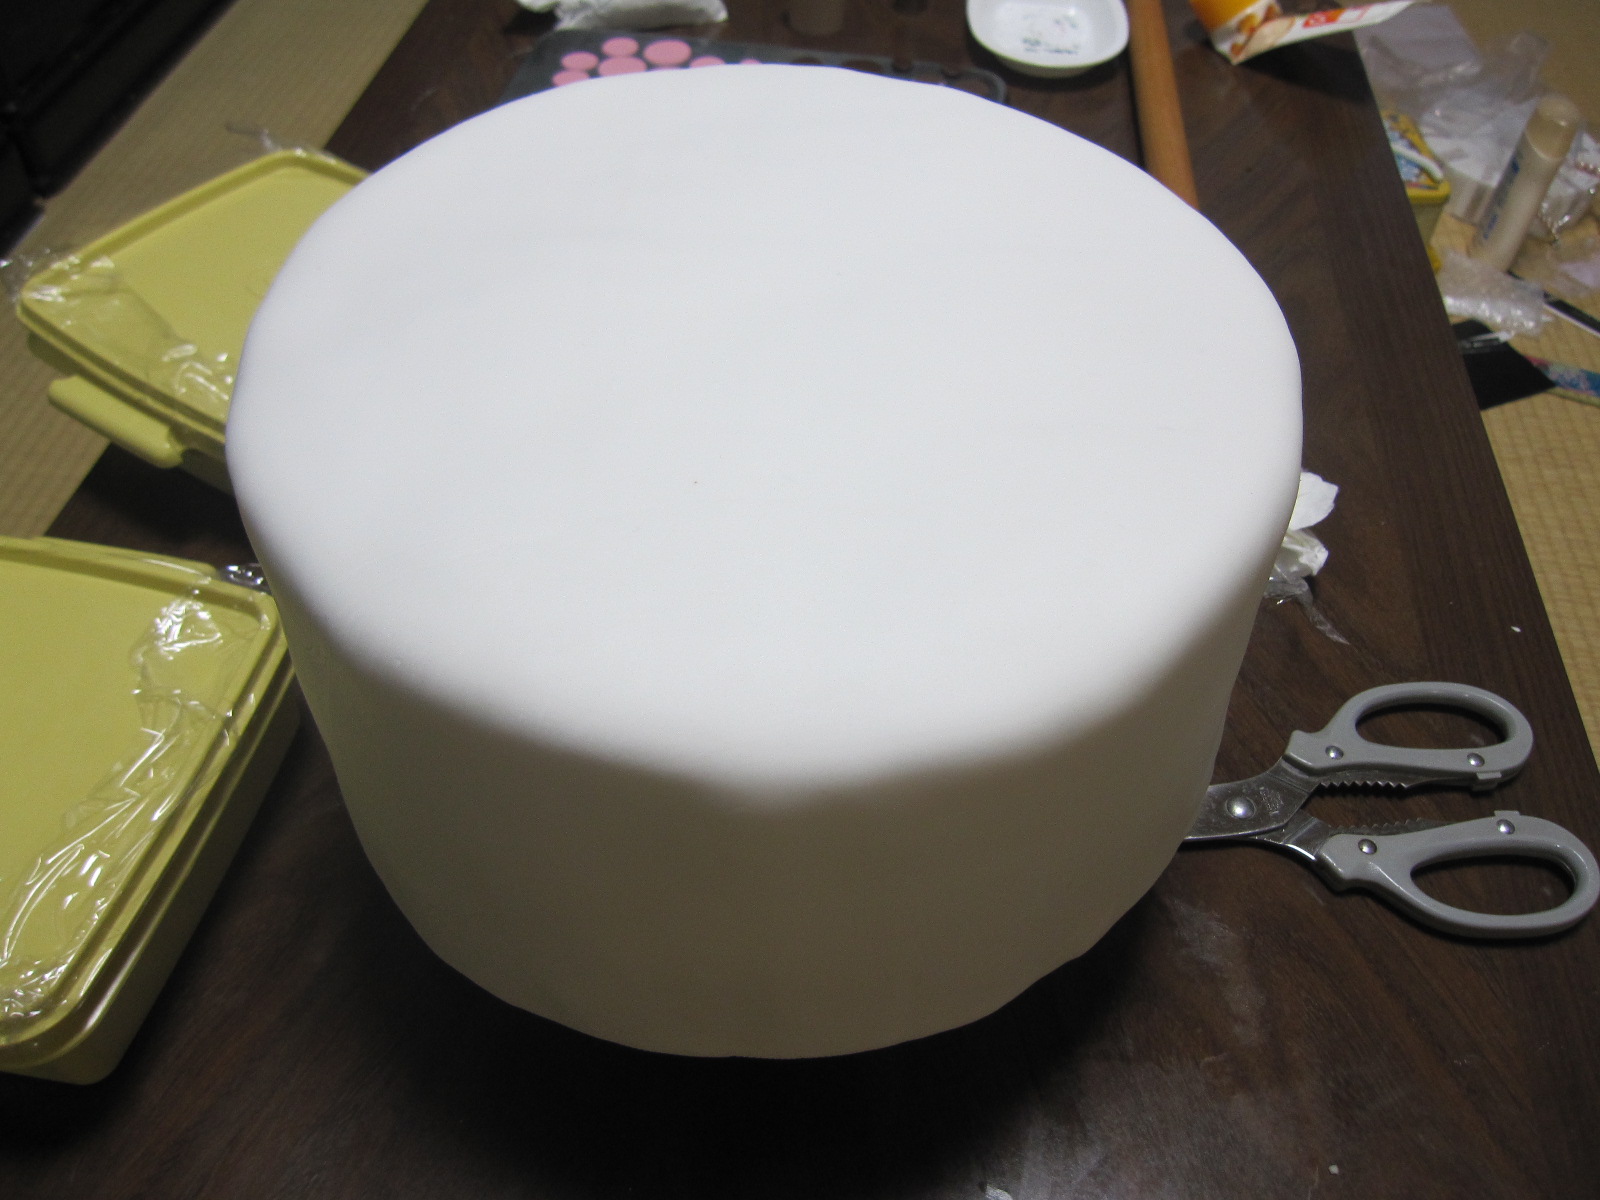
After that, it was re-covered by sugar paste & decorated with other parts made of sugar paste as well 🙂

It took me an hour just to decide the dots pattern….

IMG_2604 - コピー

After I covered everything, I put the sugar ribbon & pearl on the top, then it was finally done :D!

IMG_2610

When I was carrying the cake to the church I was dying due to the big pressure not to break the wedding cake :((((

Although it took such a long time for preparation,
I was so happy to see my best friend’s stunning smile at the special day.

IMG_2667

025

That was the biggest cake that I ever made in my life.
At least I can say that I was not very lazy at that moment 😛


Heart shaped boiled egg<3


Konnichiwa:D

What is your favorite egg dish?
in other word, what do you normally cook with eggs?

I guess one of the most common one is a boiled egg.
We also often make and eat it in Japan.

but I want to share this cute idea of heard shaped boiled egg with you<3
Isn’t it cute?

5020399156_085f06e35a

(http://www.love-the-day.com/lovetheday/wordpress/heart-shaped-boiled-egg-tutorial/)

Eggs are normally very soft right after it’s cooked so that it actually can be shaped while cooling down.

Ingredients

– Egg
– Milk carton or any juice carton (cut open, washed well and dried)
– Chopstick (round one is ideal)
– Rubber bands

All you need for the preparation is just cut hard paper !

Step 1: Cut milk carton and fold it in half lengthwise.

5019789379_84414ef65f

Step 2: Make a hard boiled egg.

How-Long-to-Boil-Eggs

You can cook eggs for your favorite minitues, but I personally recommend to cook about  10 to 12 mins to form heart easily.

boiled-eggs-10

Step 3: While the egg is still warm, peel the egg and put the egg on the milk carton, place a chopstick on the center of the egg, and put rubber bands on the both ends.

5020398416_c1326e88aa  5019789613_5114ce18b0

Step 4: Leave it for about 10 minutes. (Keep the egg in the fridge if it’s summer time.)

5019789613_5114ce18b0

Step 5: Take the chopstick off and cut the egg in  half.

5019789977_c073607467 5020399054_b143a41752

Cute heart shaped eggs are ready to be eaten :D!

5020399156_085f06e35a

As you may guess, we can form boiled eggs to any shapes while it is warm.

5020383164_532a20f910 5020386177_b96514222d

There is no special technique, plz try and make somebody surprized X)

imagesCAW48SAJ

Lastly I introduce the video clip which I found on YouTube.
It explains many details, please take a look at it!

Have a nice day 😉

This entry was posted on October 16, 2013. 1 Comment

No need to roll? Easy tip to make Tamagoyaki.


Konnichiwa:)
Have you ever tasted Tamagoyaki?

untitled

Tamagoyaki , or Dashimaki is a Japanese rolled omelette which made of eggs, sugar, and soy sauce.
When dashi-soup is added to the egg mixture, it is called dashimaki tamago.

It is a classic dish especially in Japanese bento lunches.

20091006_box      imagesCAGV05T1

We normally cook it in a  rectangular omelette pan, & roll it as it cooked several times.

762376282_1646c8c9d2_m
but if you don’t have the omelette pan you can use a round pan instead.

I found a video of how to make Tamagoyaki in a round pan 🙂

Huh…Do you still feel it looks difficult?
If you do, I’ll tell you a secret!

Actually Tamagoyaki itself is very flexible right after it’s cooked.
So that even you don’t roll it, you can reform it by using a bamboo mat or cooking sheet :D!

Here are the ingredients.

2 eggs
2013-09-23 08.37.17
1 tbspoon of sugar
2013-09-23 08.34.08
2 tbspoon of hot water + 1 teaspoon of Dashi soup powder
2013-09-23 08.33.26
1 drop of soy sauce

2013-09-23 08.40.09

Step1 Mix the eggs gently (do not bubble!)

2013-09-23 08.37.37

Step2 Pour Seasonings mixture to the egg.

2013-09-23 08.38.27 2013-09-23 08.37.55

Step4.  pour the egg mixture over the frying pan, & make an omulet!
at this stage, don’t worry about the shape 🙂

2013-09-23 08.41.03 2013-09-23 08.42.19 2013-09-23 08.42.55

Step 5.  Put the omulet on a cooking sheet or a bamboo mat, and roll it gently.
Shape the egg when it is still hot.
Let it stand for 5 minuted to cool down.

2013-09-23 08.44.53 2013-09-23 08.45.32

Step 6, After 5 minutes, open up! the shape looks perfectly like a proper Tamagoyaki :D!
Please cut it into a piece as your desidesd size.

2013-09-23 09.26.10 2013-09-23 09.25.37

This method is not a proper way, but if you think you can’t make a Tamagoyaki due to lack of skill,
Please start from this easy way.

Actually each home has their original Tamagoyaki recipe,
so seasoning can be varied.

If you don’t like a sweet one, you can replace to a pinch of salt.

Also, you can put whatever you want in a Tamagoyaki.
Such as Cheese,

4b653c9407b536235d2a3be7f017cfd5 8090961596887f4a6c8ede7a6ff7f1de

cc5327e70cd9d8b8072174cb8d255624

Tamagoyaki is a really something which reminds me my childhood.
When I went to school trip, my mom often put it in the lunch box.

Even we grow up, we still like to have it in our lunch box.

Especially when cherry blossum season come to Japan, many people go to picnics under the cherry blossum trees, called “Ohanami”.

hanami imagesCAHOSLA0 imagesCAQXM2ER sak_042

Sadly here is no sakura ;(
Since it’s spring now I’d love to make a lunchbox with my favorite Tamagoyaki & go to picnic!

Next thing on my to do list 🙂 hhh

Time saving! Hand made frozen food stocks :)


Konnichiwa 🙂

Market is one of my favorite places to visit.
I often go to weekend markets here in Australia.

When first I visited there, I was amazed and excited the huge amount of fresh foods.
& I even could find a lot of Asian veges that I was familiar with 🙂

4867576-3x2-940x627 4529890534_436c7f7eac_z

But….

I tend to make a huge mistake at the same time.
Yes, I often buy  too much stuff.

I’m going to tell what I do when I get so much foods.
The magical way is to make hand made frozen vege stock!

Even though some veges like tomatoes,lettuces, and cucumbers,
most of veges actually can be kept for appriximately 2 weeks in a freezer 🙂

IMG_4273 blog_import_50863c1b660e3

It is actually pretty useful because you don’t need to finish it at once
and eat it separately.

Plus, it is quite good for time saving especially during weekdays.
also it can be used when you have to be away for a while such as mid semester break.

As an example, I introduce how to make frozen onions.

Step 1, Wash Onions and chip it to your desired size.

A4BFA4DEA4CDA4AEA4DFA4B8A4F3C0DAA4EA3

work_big_04

Step 2 Place the chopped onions in a freezer bag and squeeze out as much air as possible; and seal.

IMG_7432597c4f72c6f64b09d75aa97d8aa2d63fd85696cc.28.2.3.2

Tips : Please try to put a bit separately like above.
If you have a straw, use it to remove air perfectly 😀

Ice tray is also useful!

9b8a75a1f26b0a4edbaa1bc4d21551c666bb8e80.85.2.3.2

Step3 , Write the date on the bag, if you have a pen & put it in a freezer!

When you make a frozen vegetable, make sure to remove water by using cooking paper.

chilled2

Handmade frozen veges help to make your cooking process easier 😀
Just get the amount that you want to use from a freezer, & put them directly in to a pan, pot, oven and so on.

8b95a00ffb016e16c905bc1c921f6198


http://cookpad.com/recipe/2296793

Hope this tip helps your cooking;)

Thank you for reading my blog!


How to make Sukiyaki soup !


Konnichiwa.

Have you ever tried Sukiyaki?
imagesCADI6G8T
Sukiyaki is a popular one-pot meal which is usually cooked at the table as you eat.

The word “yaki” means “sautee” or “grill” in Japanese.

The word is used because meat is sauteed in the hot skillet.
The main ingredient in sukiyaki is usually beef which is thinly sliced.
Meat slices and ingredients are simmered in soy sauce based soup.

Hotpot is an actually pretty good & easy meal to share with friends and families.
I had one with my flatmates on the cold day X(
1274019_521613181247687_411104669_o

I think hot pots can be the savior for many housewives in Japan….
because everything you have to do is make a soup, put meats and veges→leave. that’s it 😛

& most importantly, it is yummy & healthy.

Today I’m going to tell you how to make a soup for Sukiyaki XD

Ingredient (The one I used in Australia)

    • Thin sliced beef
    • 1 package of shirataki noodles.
    • 8 shiitake mushrooms
    • 1 carrot
    • 1 package of enoki mushroom
    • 1 leek
    • 1/2 wombok
    • 1 tofu

For sukiyaki sauce:

    • 100cc cup soy sauce
    • 4 Tbsp sake(rice wine)
    • 5 Tbsp sugar
    • 4 Tbsp Mirin
    • 3/4 cup hondashi soup

Step1 put 1 Tbsp of oil, and cook the beefs with sugar, Mirin, Sake wil the color change.

2013-09-16 18.53.29 2013-09-16 19.03.13

Step2 Add soy sauce & Hondashi-soup

2013-09-16 19.18.08

Step3 Cut the veges and put them all into a pot 🙂

Carrot

2013-09-16 19.16.05

Tofu

2013-09-16 19.10.23

Enoki mushrooms

2013-09-16 19.07.22 2013-09-16 19.08.26

Leak

2013-09-16 18.56.26

Wombok

2013-09-16 18.58.17 2013-09-16 18.59.14

Shirataki

imagesCAXSGM7R

Shiitake (Brown mushroom)

無題

Like this

2013-09-16 19.25.26

Don’t feel puzzled even the amout of soup is a little.
because more water will come out from those veges!

Step 4 cover the pot, cook them with low or middle heat for 30 mins.

1272874_521605144581824_1188768414_o

If you feel it’s too salty, please add a bit more hondashi-soup.
& if it is too tasteless, add more saysause & sugar 🙂

When I was in Japan I had many Sukiyaki parties with my friends which was a great fun!
In the end of Sukiyaki, when we finish most of the ingredients, we often put Udon (Japanese flour noodle).

DSC01812s-

It’s another way to enjoy Sukiyaki<3
You can put mixed egg if you want.

Hope this recipe helps you to have a great hotpot time with your friends!

Thank you for reading my blog;)


How to make carrot flowers


Konnichiwa.

Have you noticed that I often use carrot flowers for decorations?
It is actually very popular way to decotate especially Japanese lunch boxes like below 🙂

61b4fc5ba0b783a37be3779d5fd39978 a0101776_6175713

Actually,when I brought my lunch box to the uni, many people thought I spent so long time to cut it by myself.

Well. I’m too lazy to do it!

Actually all you need to make this carrot is a cookie cutter :P

I actually brought it from Japan but I think it should be available at Daiso for $2.8(http://www.daisostore.com.au/)

0336071

Step1 Slice a carrot
IMG_4226

Step2 put a cookie cutter on the carrot.

IMG_4227 IMG_4228

Step3 Punch it!

IMG_4229

Then it is done 🙂 Nothing difficult.

IMG_4230

When I buy a lot of carrots, I normally make many carrot flowers and keep it in the freezer because it could be kept for 2 weeks in there!
Extra parts can be chopped and kept in the same way.

IMG_4273

Carrot flowers are not necessary, but it can add something extra to your dish.

Please give it a try;)

IMG_4399  IMG_4350 IMG_4430 IMG_4560

Thank you for reading my blog!

This entry was posted on September 13, 2013. 6 Comments

Thank you Hayao Miyazaki ~ Studio Ghibli recipe 2~


Konnichiwa 🙂
Thank you for being interested in the studio Ghibli’s previous post.

Have you ever heard “Onigiri”?
In other word, it’s called “Rice ball”.

onigiri

ACTUALLY, Onigiri was the only one dish which I could cook when I was a high school student (-///-)
You see how easy it is.

I say, it’s one of the Japanese soul foods.
Mothers often make rice balls when kids go outside, or go to school trip.
Even we grow up, it is still always common foods to bring as a lunch in everyday life.

You may be surprised i you go to Japan and once enter a convenience store.
There are a massive numbers of onigiris on the shelf, but simply it is a usual view for us.

imagesCABSJLQK

In Hayao Miyazaki’s film, “The spirited away”,
The boy Haku gave simple onigiris to Sen when she had a huge concern about her parent.

4587036969_e71b27c463 E698A0E794BBE3808CE58D83E381A8E58D83E5B08BE381AEE7A59EE99AA0E38197E3808D

It has no seaweed and nothing inside either,
but it looks so nice when Chihiro eats them.

The reason she started crying was may be the onigiri reassured her instantly.

The onigiri in the movie was very, very simple one.
I’ll explain how to make them now;) !

Ingredient : 1cup of midium grain rice
1 teaspoon of table salt

Step 1 Put 1 cup of midium grain rice ( NOT long grain) in a large bowl and wash it with cold water.
Repeat washing until the water becomes almost clear.

when you wash, it is better to use your palm rather than fingers 🙂

IMG_4474IMG_4476IMG_4475

Step 2 add cold water until the line of 1 cup (TIPs: if you add a few drops of sake, it would taste better)
& turn the rice cooker’s switch on!

IMG_4477IMG_4478

Step 3 Once rice was steamed, please put a clear wrap in a small bowl.
It makes easier to form onigiri and your hands won’t be messed up :)!

IMG_4513

put a little amount of salt inside.

IMG_4546   IMG_4547

Step 4 put 1 scoop of rice in the bowl

IMG_4548

Step 5, Please take a look at the movie 🙂
In order to make a triangular onigiri, you just need to form your hands into L shape,
and repeat holding and turning 🙂

When you remove the wrap,  it’s done 😉

IMG_4551

I brought those onigiris to my workplace today.
It reduces my tiredness, and made me a bit nostalgic.

Please try making the spirited away’s onigiri :9!


Thank you Hayao Miyazaki. ~Ghibli recipes~


Konnichiwa 🙂

Last week, One of themost famous Japanese Animators, Hayao Miyazaki announced that he is retiring X(
It may shocked many fans all over the world.

Just like many in Japan,
my generation grow up with movies of Ghibli too.

OLYMPUS DIGITAL CAMERAOLYMPUS DIGITAL CAMERAOLYMPUS DIGITAL CAMERA

I even went to the studio Ghibli museam 3 times when I was in Japan, which was really lovely.
( you should go if you visit Tokyo;))
It is very sad not being able to see his new movie anymore.

Actually, there are s lot of mamorable foods in Hayao Miyazaki’s movies.
& it ALWAYS made me hungry while I was watching it…

various-foods

Even though it may not be a proper ‘cooking’ I introduce how to make some of them in Australia.
First one is the ramen noodle in “Ponyo on the Cliff by the Sea” (Gake no ue no Ponyo)

I personally like Ponyo’s cute voice.
Her favorite food is ham and she always is shouting like ” Haaaaam!”

This ramen was served by Sosuke’s mother when they finally reached to the home in the strong storm.

03_keyword_07 imagesCA0B2DMZ imagesCA0DCPWC

Real one must be “Chicken Ramen”,

ChikinRamen

But since I’ve never seen it in Australia, I suggest to use instant say-sause ramen like this 😀
The one I used this time is “Demae icchou”.

IMG_4525    IMG_4530

Step 1. Boil 500ml of water in the pot

IMG_4527

Step 2 put the ramen noodle in to the pot, cook for 3 minutes.

IMG_4531

Step 4 while the nooble is being cooked,
Please prapere for 1 hard boiled egg for the topping.

IMG_4537 IMG_4539

Cut 1 ham into the half

IMG_4538

Chop a leak finely

IMG_4540 IMG_4541

Step 5    When the ramen noodle is cooked, put them into a bowl.
then add seasoning and sesami oil, and grntly mix.

IMG_4532 IMG_4533 IMG_4534 IMG_4536

Step 6 Put ham (Ponyo’s favorite!), chopped leak, 1/2 boiled egg on it,
then it’s ready to searve 😉

IMG_4542 IMG_4543

You can eat like Ponyo if you want, say “Haaaaam” hahaha.

03_keyword_07 IMG_4544

If you are still shock too, please try make one , you might feel as if you were in the movie of Ponyo ;D!

I also look forward to seeing the Hayao Miyazaki’s latest and final movie “The wind roses” when I back to Japan 🙂

971230_10201506403597396_299588401_n

I’m going to introduce how to make Onigiri (rice ball) in the spirited away next.

E698A0E794BBE3808CE58D83E381A8E58D83E5B08BE381AEE7A59EE99AA0E38197E3808D  IMG_4551

See you everyone *

Thank you for reading my blog!


12min Wombok & Pork mille-feuille (Japanese hondashi taste)


Konnichiwa 🙂
Today’s menu is Wombok & Pork mille-feuille.

IMG_4430

It may look like hard, but actually it is super easy 12min recipe.
Since I came to Australia, I realised that Wombok (Chinese cabbage) is pretty cheap here 🙂

This recipe is popular in Japan especially during winter,
Although it’s pretty easy and healthy, it’s quite tasty and good to share with friends 🙂

Here are all ingredients you need.
-8-10 leafs of wombok (you can replace with cabbege is you want)
-Pork minse
-Hondashi powder (available at Asian supermarkets)
Optional : Sake ( Japanese rice wine)

IMG_4402IMG_4331 IMG_4335

Step1 Wash leafs of wombok
IMG_4403

Step2 put 2 leafs of wombok in the bowl.
IMG_4404 IMG_4405

Step3 put pork minse on the wombok leafs, cover with another leaf.
IMG_4406 IMG_4407

Please continue doing it again & again until it becomes full.

IMG_4407 IMG_4408

Step 4 Please mix 1 teaspoon of hondashi powder in to 50ml of hot water.
add one table spoon of sake (rice wine), a little amount of salt.

IMG_4409 IMG_4410 IMG_4411

Step 5 Gently pour it over the bowl

IMG_4413

Step6 cover it with clear wrap

IMG_4415

Step 7 Heat it up with 900W for 12 minutes

IMG_4416 IMG_4417

Step 8
Poke a  stick in it and make sure if no red soup comes out.
If it’s not, it is ready to searve:) Please throw the soup away.
IMG_4418 IMG_4419 IMG_4420

Step 9
Cover the bowl with a large place and up side down!
IMG_4421 IMG_4422 IMG_4423

If you have additional vegetables like carrots, feel free to put on the top as decoration;) (it’s optional)
& cut it like a cake ❤
IMG_4430 IMG_4427IMG_4428

Personally, I like to have it with Ajipon (the Japanese tangy soy-based sauce – available at Asian super markets)

IMG_4424

Even I used Japanese seasoning, you can replace it with Chicken bouillon if you prefer Western taste:)

A good thing about this recipe is nutritions in wombok can be kept in it.
If you are busy and wish to have something healthy quickly, please give it a try;)

This dish’s shape looks like a cake, so it is also suitable to share with friends:D

Here is my friends who helped me to finish it when I cooked too much. hahaha

IMG_4431

Thank you for reading my blog ;)!

This entry was posted on September 6, 2013. 3 Comments

15 minute simple Microwave Nikujyaga


Konnichiwa.
I can’t believe it’s already September!
Time flies so fast!

I’m still struggling with tough work of my first mid-term in Australia.
but even if I’m busy I am eager to eat something healthy & yummy X)

Today’s menu that I’m going to introduce is “Nikujyaga”. (Stewed tasty potatoes and meat with veges)

Nikujyaga is one of the most common meals at home in Japan.
which normally is cooked in a pot.

IMG_4399

but if you use a microwave, it will take just 15 minutes until it becomes ready to serve.

I changed some ingredients such as meat from thin sliced pork to bacon,
to make it easier in Australia.

Basic ingredients are 3 potatoes, 2 bacons (normally sliced pork or beef),1/2 carrots, 1/2 onions and 3-4 snow peas.
Yes, you can get all of them at supermarkets.

IMG_4383 IMG_4386

Step1 Please cut bacons and vegetables into pieces. (Tips: don’t cut potatoes too small)
If you have washed baby potatoes, it is not necessary to peel the skins 🙂

IMG_4387

Step 2
Put potatoes, carrots, & onions on the plate, add 50ml  of water.
cover it with the microwave cling wrap and heat it up with 900w for 3 minutes.

IMG_4384IMG_4392

Step3

Mix 50ml of mentsuyu (available at Asian super markets) & 150ml of water.
Add snow peas and bacons
& gently pour it over the vegetables.

IMG_4382IMG_4388IMG_4395

Step 4 Cover with wrap again, and heat it up with 600W for 15 minutes 🙂

IMG_4397

Step 5: Heat additional snow peas & carrots for decoration with a little water, if you want (wrapped, 900W, 1 minute).

IMG_4398

Step 6 Put snow peas and carrots on the top of the Nikujyaga.
IMG_4399

For this recipe, I actually skipped all troublesome steps to measure sugar, sake, soysauce, dashi-soup by using only “mentsuyu”.

You will be amazed because it actually tastes the same.
I’m glad if it helps to save your time when you want to try Nikujyaga 😀 !!

If you would like to know the proper way, this link could be useful:)

Thank you for reading my blog;)

This entry was posted on September 2, 2013. 5 Comments